
Thursday, August 25, 2011
Wednesday, August 24, 2011

Saturday, August 20, 2011
2011 - 20th August - Moved Vac Tank for better access to no.4 Plug
I replaced the fuel line from the Vac Tank to the carby today, as for many years I have been running 1/4" when it should be 5/16". At some time in the past I put on carby fittings from an earlier model not realizing the tube was a smaller size. Seems pretty dumb, but that's my excuse.This was pointed out to me at the 2009 Chev 4 Tour in Castlemaine, Victoria, and because the car seemed to run ok, I never gave much thought to changing the tubing. If I think back there have been a couple of times when the beast has died at high speed, started again straight away, with me thinking I have knocked the ignition switch with my knee. Will let you know how that goes.
At the same time I decided to move the Vac Tank for better access to no 4 plug, as it has always been a bit difficult to get a spanner and my gorilla fingers in between the Vac Tank and the block. I moved the tank 1" up and 2" to the right, which now gives plenty of room to get at no. 4 plug.
Hopefully the combination of the bigger fuel line and higher Vac Tank will be better fuel flow. The bottom of the Vac Tank is now 5 1/2 inches from the top of the carby bowl.
Thanks to Chris in Sydney and Kevin from Dapto for giving me the idea.


After these pictures where taken, I decided to replace the loop from the manifold to the vac tank, and of course polish the tube and fittings before a coat of clear lacquer.
The before shots are above, the after below.


Saturday, August 13, 2011
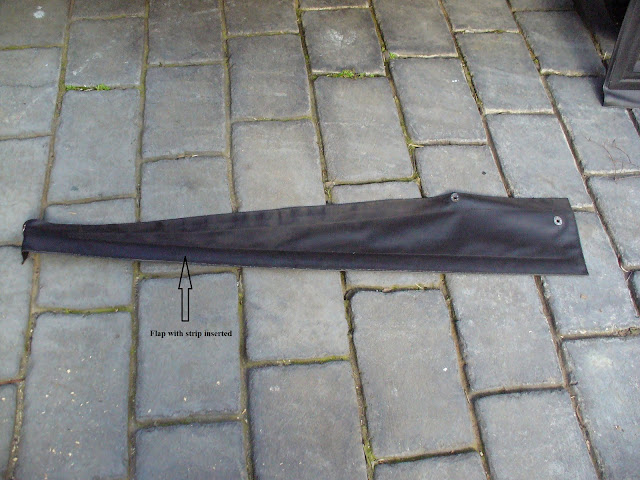
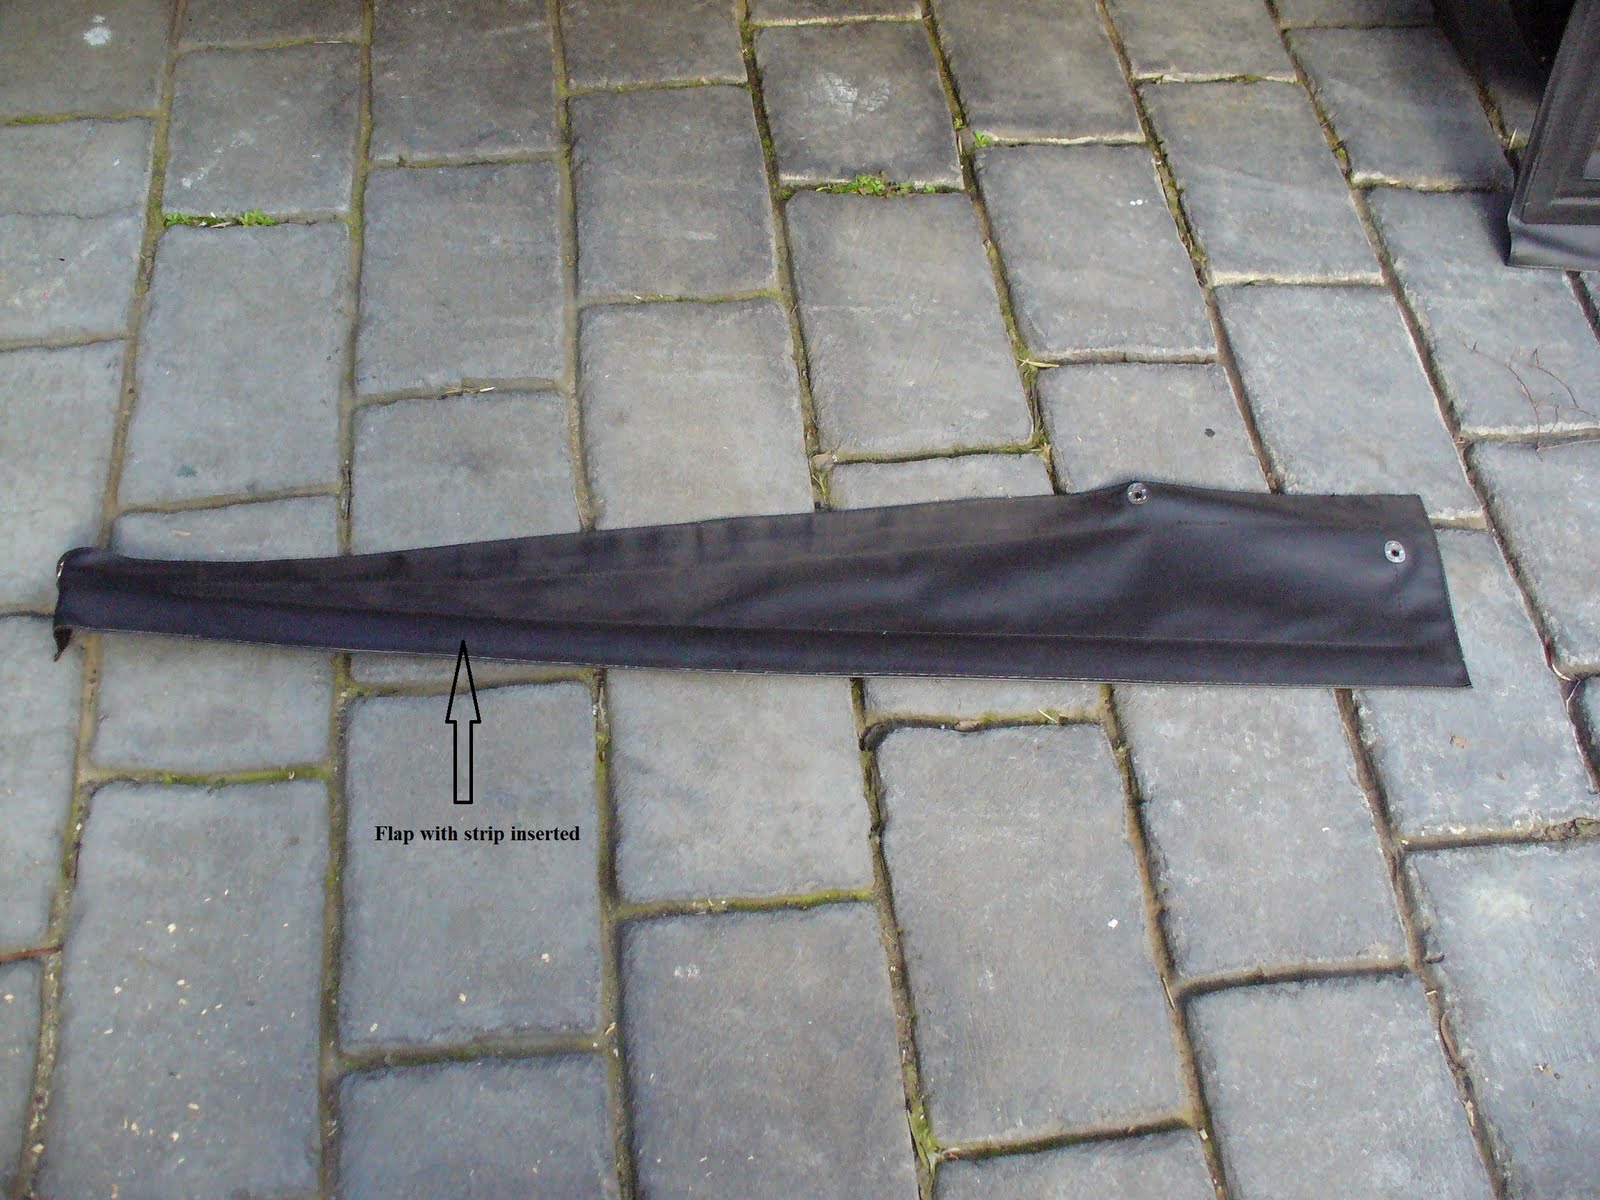
2011 - 14th August - Improved Wind Sealing on the Side Curtains (Updated 5th September)
My Chev was originally upholstered by a couple of old guys back in the 70's who were apprentices on the Holden assembly line back in 1928. So I believe the hood and side curtains are as per the factory specs of close.
I have always had a problem at around 25 MPH and above with the wind pushing the side curtains in behind the flap coming down from the hood to seal the top of the curtains, and on the opposite side of the car the curtains would be pushed out. Cross winds were about 200% worse.
I have slowly been making the car freeway friendly (being able to cruise at 40 to 45mph) and finally got around to the side curtains and the sealing flap. The rectification was a lot simpler than I expected.
After refitting the side flaps to have a consistent coverage of the top of the side curtain, I then carefully cut a small opening in the bottom end of the flap and inserted a 1.5 metre piece of 25 x 3mm flat steel strip into the bottom edge of the flap, very similar to putting weights in the bottom of a curtain.
Pleased to say it worked a treat, side curtains now stay in place, have not yet tested in cross wind, but even at 50 MPH the car was a lot quieter, with the side curtains not flapping around as much as previous.
All that remains to finish the job is remove the metal strips, paint and refit, then seal up the small slit in the end of the flap.
I have been going to do something about this for the last 5 years or more. Some where between "being slack" or "you cant rush these things" is the correct answer.
A few photos below.


Update 5th September.
Went on a 80 mile rally yesterday, and the results were excellent. Driving in the windiest conditions you could imagine, yet the car was very quiet and sealed with no wind or rain getting in. For the first time I was not concerned that the side curtains on one side would blow in with the other side billowing out. Why did I not think of this many, many years ago?
Sunday, August 7, 2011
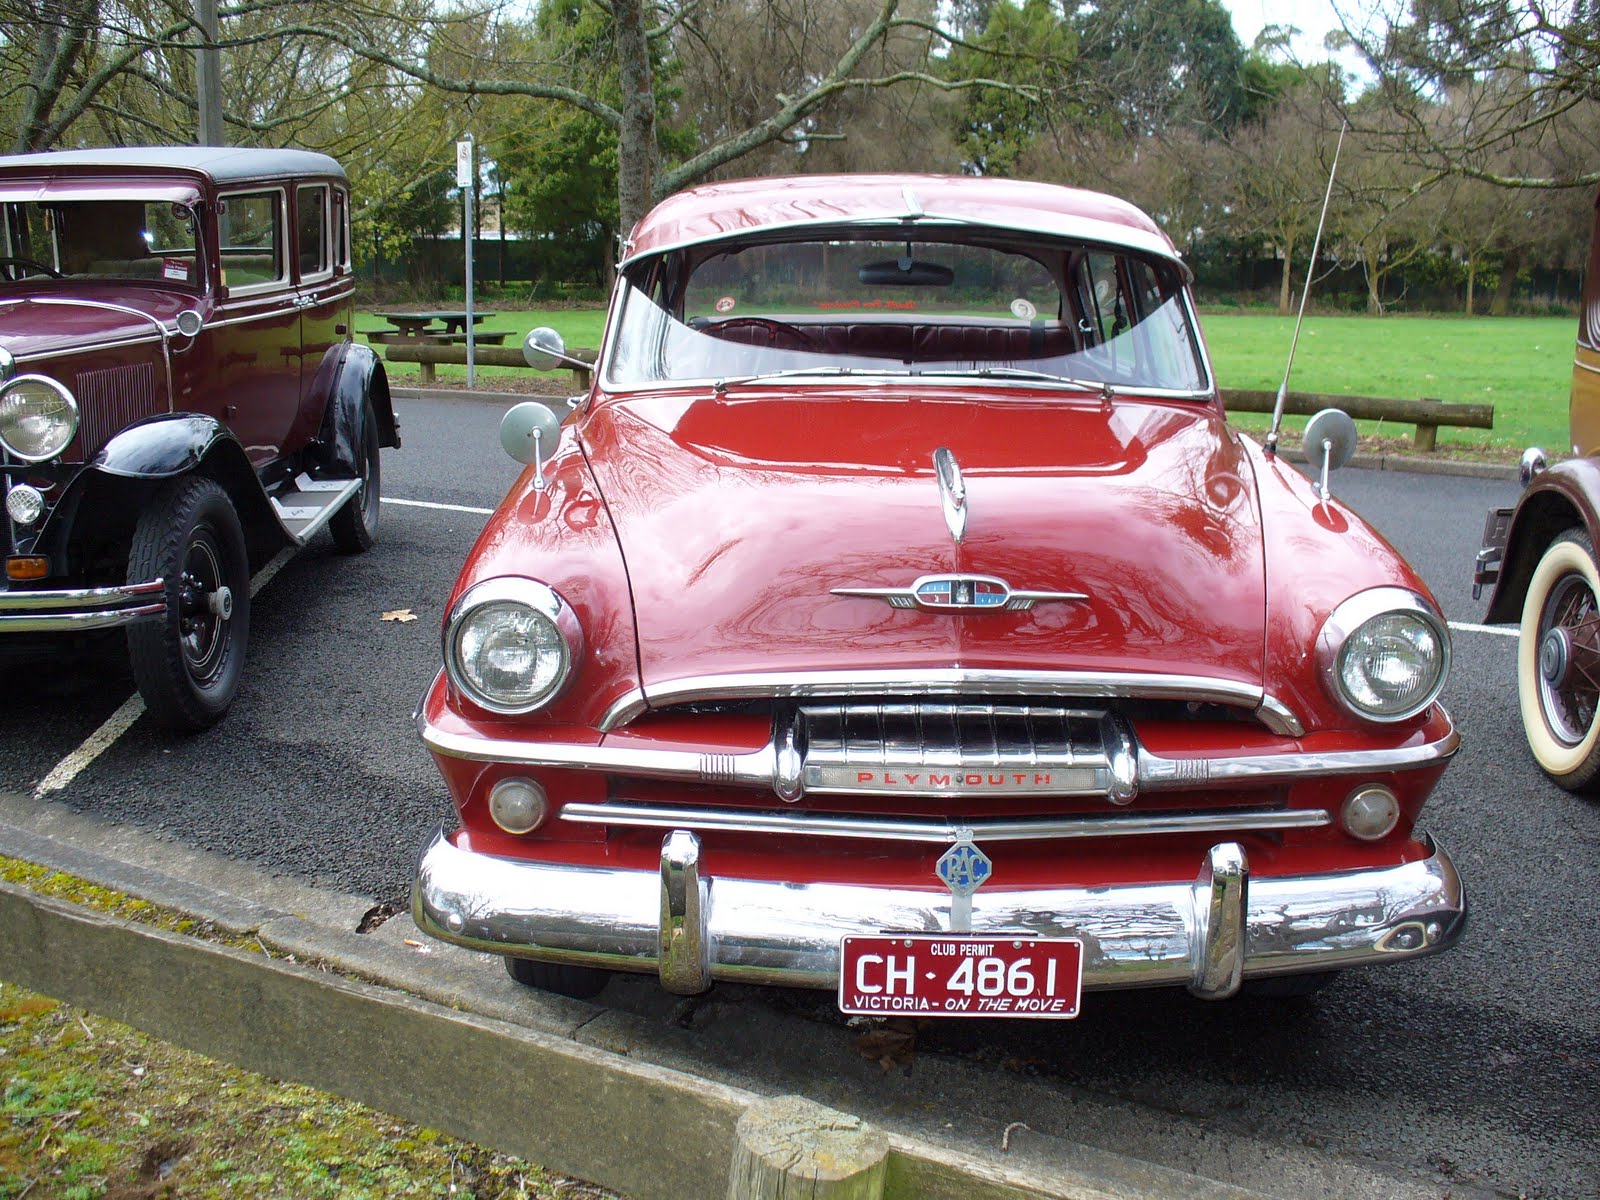
2011 - 8th August - 109 Mile Club Run - No Problems
As late as 6.30 am this morning the threat of bad weather almost persuaded me not take part in a planned club run from Narre Warren to Warragul, a round trip of 109 miles from my house in The Basin.
I decided to take a gamble and it turned out to be perfect weather all day. Not a drop of rain or the storms that were predicted.
My club, the Dandenong Valley Historic Car Club http://www.dvhcc.com.au/ did a run to Warragul to meet up with the West Gippsland Vehicle Restorers Club at their new Warragul club rooms.
http://carclubs.shannons.com.au/westgippsland/
Travelling up in convoy at about 45 MPH, and returning home on my own at about the same speed, the Chev did not miss a beat. Very good confidence building.
Well done to the DVHCC for organizing a great run, and thanks to the West Gippsland boys and girls for the hospitality, and allowing us to enjoy our BBQ lunch in the club rooms.
The West Gippsland club meets each and every Saturday morning. Its just as well their not close buy.
As selection of photos follows.


Monday, August 1, 2011
Twin Battery Set Up
When I restored my Chev there was never any doubt that I would keep the 6 volt system, despite Auto Electricians and others pushing me towards a 12 volt conversion.
I am happy to say that 38 years later I am pleased I stayed with 6 volts, with only one modification.
About 20 something years back I wanted a bit more cranking power, and after eliminating 8 volt batteries installed a twin 6 volt battery setup.
The system has served me well using batteries that are readily available for trucks and forklifts.
Happiness is a strong 6 volt cranking system, and all these years later I am still on the same starter motor, and the 28 generator keeps both batteries charged.

Subscribe to:
Posts (Atom)