Another bit of progress, a few more baby steps to finishing the dirty greasy part of the restoration.
Even though I am hoping to swap the 29 torque tube, diff housing and tail shaft for the 28 equivalents gave it an initial wire brushing to take off any surface rust and grease.
Came up pretty well, and a bugger that its in better condition than the 28 ones.
You can see the difference between the "clean" 29 bits versus the untouched 28 bits that will get the same treatment tomorrow.
Great to have 2 good serviceable diffs, both would need bearings, and the 28 has less pitting than the 29.
Meanwhile in another part of my spacious shed, not!!! Actually I just turned around. First spare head is out of Rustbuster after a 4 day soak, all rust gone from internal water cavities. All that's needed to do next is a wire brush, good spray with WD40 and into storage in the spares cupboard.
Spare head 2 has now jumped in the Rustbuster pool
The purpose of this Blog
This blog is to detail my 50 years (1973 - 2023) with a 1928 Chevrolet tourer, affectionately called "The Red Chev".
The acquisition, restoration, improvements and my experiences over the years are covered in as much detail as I can remember.
Some of the later postings include car club outings and other vintage car items that I hope will be of interest to people.
If you have the time, scroll back to where it all began in 1973 and follow the journey so far.
Thanks for dropping by.
Regards Ray Dean
See my new section "The Red Chev - Repairs, Improvements, Maintenance and Technical Details" located on the left hand side of the screen.
The acquisition, restoration, improvements and my experiences over the years are covered in as much detail as I can remember.
Some of the later postings include car club outings and other vintage car items that I hope will be of interest to people.
If you have the time, scroll back to where it all began in 1973 and follow the journey so far.
Thanks for dropping by.
Regards Ray Dean
See my new section "The Red Chev - Repairs, Improvements, Maintenance and Technical Details" located on the left hand side of the screen.
Pages
Saturday, June 13, 2015
Thursday, June 11, 2015
Never Too Old to Learn about old Chevs
Many thanks to Steve Lake, who has a 28 and 29 Chev and follows my blog.
Steve rang me tonight to suggest I check both torque tubes and tail shafts as he thought the 28 was longer than the 29.
He was right, and thanks Steve for saving me a lot of work and possible drama down the track.
So I can use the diff, the axles and the rest I will swap.
Bit of a bugger as the uni end of the 29 is not as worn as the 28, but as they say.... it happens.
Thanks again Steve
Steve rang me tonight to suggest I check both torque tubes and tail shafts as he thought the 28 was longer than the 29.
He was right, and thanks Steve for saving me a lot of work and possible drama down the track.
So I can use the diff, the axles and the rest I will swap.
Bit of a bugger as the uni end of the 29 is not as worn as the 28, but as they say.... it happens.
Thanks again Steve
Wednesday, June 10, 2015
Day 15 - 28 Chev Ute Restoration (10th June 2015)
Good progress over the last 2 days, a rear end stripped each night.
Results so far are very encouraging, as what ever parts look suspect in one, are good in the other.
Still need to pull out the tail shafts to make sure the pinion key ways are good.
Still have to decide which torque tube is in better condition at the uni-joint end, but my money is on the 29.
Still to be stripped, cleaned, wire brushed and the teeth lightly polished, this crown wheel will be very serviceable with a new set of bearings.
29 tail shaft has very good splines and will look better once the surface rust has been removed.
Hand brake half shafts will need to be de-rusted, straightened, worn areas built up, and then slipped back into brass bushings in the diff housing and brake backing plate. Will be a lot better than the metal to metal they were made with.
Results so far are very encouraging, as what ever parts look suspect in one, are good in the other.
Still need to pull out the tail shafts to make sure the pinion key ways are good.
I had forgotten about the mess.
Still have to decide which torque tube is in better condition at the uni-joint end, but my money is on the 29.
And the grease
Still to be stripped, cleaned, wire brushed and the teeth lightly polished, this crown wheel will be very serviceable with a new set of bearings.
29 tail shaft has very good splines and will look better once the surface rust has been removed.
28 splines are very good.
Hand brake half shafts will need to be de-rusted, straightened, worn areas built up, and then slipped back into brass bushings in the diff housing and brake backing plate. Will be a lot better than the metal to metal they were made with.
Tuesday, June 9, 2015
Day 14 - 28 Chev Ute Restoration (9th June 2015)
Time to see if I got a bargain with a $50 rear end from Geelong that I picked up a few weeks back.
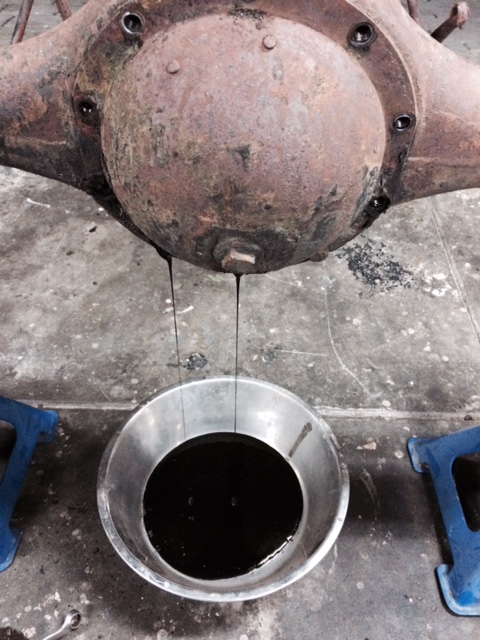
.First things first drain the diff and remove the cover plate
Just when I was getting excited, a broken tooth on the pinion, bugger, but no drama as I have plenty of spares. Just means a bit more work.
The main bonus is the axles which have a lot better keyways than those on the ute which are flogged out.
The next step will be to pull apart the ute rear end in the next day or so, and check that out.
I will then use the best parts from the two, plus a few spares to make the ute's restored rear end
.First things first drain the diff and remove the cover plate
More like heavy grease than oil
The crown wheel has a few slightly pitted teeth, but very useable
Just when I was getting excited, a broken tooth on the pinion, bugger, but no drama as I have plenty of spares. Just means a bit more work.
The final verdict......... a very good pick up
The next step will be to pull apart the ute rear end in the next day or so, and check that out.
I will then use the best parts from the two, plus a few spares to make the ute's restored rear end
Monday, June 8, 2015
Day 13 - 28 Chev Ute Restoration (8th June 2015)
Very pleased to report progress has been made, and I have reached the first goal I set myself:
1. Cleaning and prepping all the small bits and pieces and spares, setting up the molasses bath, and throwing in the parts for de-rusting. (tick this off as completed)
The last few days over a long weekend went like this:
All parts were wire brushed with an angle grinder and washed in petrol to remove any loose rust flakes, paint or grease.
The four spare heads were also cleaned, but due to the weight and molasses not being "kind" to cast iron, these will be soaked for a few days in rust buster. I have had excellent results with rustbuster on heads previously.
To do it once and do it right, the brake cross shaft plates were separated by grinding down the rivets heads to expose concealed rust that needs to be removed.
I ran a die nut down the threads on the U-bolts, which will save any dramas during re-assembly.
Relieved to at last set up the molasses bath, 40 liters plus water to make up just over 400 liters.With the weather being on the cold side and the molasses being very thick, I connected the external hot water service drain pipe to the garden hose, giving me 400 liters of steaming hot water, and flushed the hot water service at the same time.
Each of these wires leads to one mans rusty rubbish, another mans treasure, 1928 Chev wise that is.
I expect the parts will soak for at least one to two weeks, and I will check them every few days.
Even the dog got into the act with all the activity in the back yard. I expect to add more molasses and water when the body panels are due to go in.
The next two goals I have set myself are
1. Clean and strip the front and rear axles.
2. Clean and de-rust the chassis. I have decided to use the wire brush and flappy disc on the angle grinder and rust buster approach as opposed to sand blasting. This is being done to:
A/ keep the cost down
B/ I have seen several chassis that have been sand blasted and painted that when hit with a hammer near a cross member produce rust dust. Sand blasting does not get into the metal to metal joins, rustbuster will. It will be more work on my part and may take a bit longer, but hopefully the results will make the effort worthwhile.
That's the theory, stay tuned and I will let you know.
1. Cleaning and prepping all the small bits and pieces and spares, setting up the molasses bath, and throwing in the parts for de-rusting. (tick this off as completed)
The last few days over a long weekend went like this:
All parts were wire brushed with an angle grinder and washed in petrol to remove any loose rust flakes, paint or grease.
The four spare heads were also cleaned, but due to the weight and molasses not being "kind" to cast iron, these will be soaked for a few days in rust buster. I have had excellent results with rustbuster on heads previously.
To do it once and do it right, the brake cross shaft plates were separated by grinding down the rivets heads to expose concealed rust that needs to be removed.
I ran a die nut down the threads on the U-bolts, which will save any dramas during re-assembly.
Relieved to at last set up the molasses bath, 40 liters plus water to make up just over 400 liters.With the weather being on the cold side and the molasses being very thick, I connected the external hot water service drain pipe to the garden hose, giving me 400 liters of steaming hot water, and flushed the hot water service at the same time.
Each of these wires leads to one mans rusty rubbish, another mans treasure, 1928 Chev wise that is.
I expect the parts will soak for at least one to two weeks, and I will check them every few days.
Even the dog got into the act with all the activity in the back yard. I expect to add more molasses and water when the body panels are due to go in.
As I mentioned before the heads will be soaking in rustbuster one at a time for 2 to 3 days. All being well this will leave the internal water jackets a nice shade of gun metal grey.
The next two goals I have set myself are
1. Clean and strip the front and rear axles.
2. Clean and de-rust the chassis. I have decided to use the wire brush and flappy disc on the angle grinder and rust buster approach as opposed to sand blasting. This is being done to:
A/ keep the cost down
B/ I have seen several chassis that have been sand blasted and painted that when hit with a hammer near a cross member produce rust dust. Sand blasting does not get into the metal to metal joins, rustbuster will. It will be more work on my part and may take a bit longer, but hopefully the results will make the effort worthwhile.
That's the theory, stay tuned and I will let you know.
Tuesday, June 2, 2015
Subscribe to:
Posts (Atom)