The purpose of this Blog

This blog is to detail my 50 years (1973 - 2023) with a 1928 Chevrolet tourer, affectionately called "The Red Chev".

The acquisition, restoration, improvements and my experiences over the years are covered in as much detail as I can remember.

Some of the later postings include car club outings and other vintage car items that I hope will be of interest to people.

If you have the time, scroll back to where it all began in 1973 and follow the journey so far.

Thanks for dropping by.

Regards Ray Dean


See my new section "The Red Chev - Repairs, Improvements, Maintenance and Technical Details" located on the left hand side of the screen.


Pages

Wednesday, November 6, 2013

Sunday, November 3, 2013

Unexpected Gear Box repair

While testing the 6 to 12 volt converter from yesterdays session, the gear change seemed noticeably sloppy. This was a surprise as I overhauled the top of the gearbox in 2010, which resulted in a very tight gear change.

The first thought was I had a broken spring in the gear shift top cover, but after pulling the gear stick out, the spring was fine.


The next step was out with the carpet, after sealing up the top of the box from dirt and dust.


Out with the floor boards, which gave me the opportunity to check out the connections and water levels in the double battery set up.


Removed the gear box tower, all appeared OK with the selectors and gate, no excessive wear.


Nice to see the gears that I put in (NOS) back in the nineties are still in good condition.


Found the problem?

In 2010 I replaced both the pins in the top of the tower that the gear stick pivots on, and on initial checking one was a fraction loose. This was part of the reason, the rest of the slop was caused by excessive play between the pins and the groove in the gear change ball. The pins I used for the replacement where normal mild steel, and the groove in the gear change ball had been welded and machined back to standard. So its look like the mild steel pins have worn.

As an interim measure I was able to turn both the pins 90 degrees so that the original clearance was restored. I then re peened the ends of both pins into the housing.

I then stretched the gear shift retaining spring about 5 mm, refitted the gear change, made a new gasket for the top of the gear box, and put the whole lot back together.

Below is a not so clear picture of the pins in the gear box tower, which are smooth and not rough as the blurred picture looks.


Went for a test drive, everything back to normal, gear change is "tighter" and smoother.

Having a few spare gear box towers, some with replacement pins fitted, will enable me to make and have ready a replacement top with hardened steel pins if the problem happens again.

Saturday, November 2, 2013

Installing a 6 to 12 volt converter into the Red Chev (updated 4th Nov)

Driving the Red Chev more these days, I have been concerned by the fluctuation of the drum speedo, even though I reconditioned it in 2010.

In my daily work car the GPS appears more accurate than a modern speedo, so if its good enough for a 2011 Commodore, why not for the Red Chev. Highway speeds in the Red Chev are not a worry as I don't reach the 100 KPH speed limit, but it's good to know how fast or slow you are going.

My concern for travelling at the right speed is related to the 60 and 70 KPH zones.

After asking around to see what was available I called into Jaycar Electronics new store in Fern Tree Gully and bought up a few parts to "make my own" 6 to 12 volt converter. The aim is to have a set up that can not be seen when not in use.

Parts and prices were

AA0264  Module Converter DC / DC 6-14 v / 11 - 26 v @ $44.95
PS2009  SKT Cig Lighter Double under Dash  @ $12.95
RP3508 Potentiometer @ $2.25
SZ2015 Fuse Holder Inline @ $1.75
SF2200 (Pack 10) 5 amp fuses @ $3.50


The converter is the heart of the set up.


I went for a twin outlet socket (to run both a GPS and charge a mobile phone), which when fitted will be completely out of site.


Yes Virginia, this is a potentiometer.


The converter instructions call for a large heat sink area, which normally would be the firewall, but as it also requires a temperature below 60 degrees, I decided it was safer to install the whole set up on a mild steel bracket 9" x 2.5", which I made, predrilled and painted before the final fit up under the dashboard, which will be out of sight unless a lead is plugged in.


After a few minor adjustments, everything was bolted into place. You will see by the angle of the converter that I did not allow enough space for connecting the potentiometer. If I had my time again I would turn the converter 90 degrees to the left so the wires fed into the middle of the bracket.


A 5 amp in line fuse is installed in the positive wire to the outlook sockets, with another in the inlet wire to the converter. The set up is controlled by a toggle switch installed in the dash. and is only powered when the ignition is on.


We have contact
 

Voltage looks good, but I question how effective the potentiometer is at the base minimum output as adjustment makes no change to output and voltage can range from 12.2 up to 14.2.


Now you see GPS


Now you don't see GPS.

I now have another reason to take the Red Chev for a drive. "Honey I need to charge the GPS and mobile phone.


Update as at 4th November
 
More testing went well, no significant increase in temperature of the converter, it was no warmer than the surrounding metal work.
 
More pictures of the fit up below
 

Looking from under the dash out

 
Looking up under the dash, and I still need to tidy up the wiring a bit more.

Tuesday, October 29, 2013

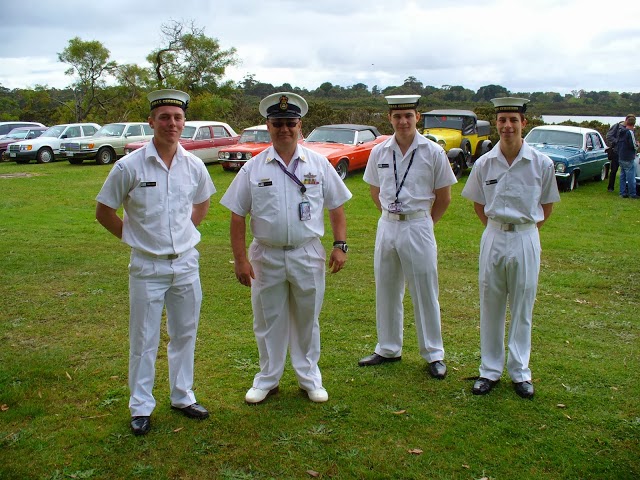
Cerberus Naval Base Open Day (including a large car display)

The Red Chev travelled down to Cerberus to be part of a very large turnout of  veteran, vintage and classic cars as part of the open day. A 94 mile round trip with no dramas.

A great day out for all involved, and I was able to see the location where my father, Harry James Dean, spent the last months of his naval service during the war.

Lots of pictures to get through, so I will keep the narrative to a minimum, except to make mention of the Royal Australian Navy campaign and Battle Honours board below, which lists several engagements that my father was part of on the HMAS Australia. http://www.navy.gov.au/hmas-australia-ii

Pacific 1941-1945
Coral Sea 1942
Caudal Canal 1942
Leyete Gulf 1944


With a large quantity of pictures, I have separated them into the relevant groupings. Just click on the link you would like to see.


http://my28chev.blogspot.com.au/2013/10/base-attractions-and-history.html


http://my28chev.blogspot.com.au/2013/10/in-and-out-of-uniform-plus-few-odds-and.html


http://my28chev.blogspot.com.au/2013/10/military-equipment-old-and-new.html


http://my28chev.blogspot.com.au/2013/10/navy-auto-hobby-shed.html


http://my28chev.blogspot.com.au/2013/10/veteran-and-vintage.html


http://my28chev.blogspot.com.au/2013/10/classics.html


http://my28chev.blogspot.com.au/2013/10/old-holdens_29.html


http://my28chev.blogspot.com.au/2013/10/trucks-and-tractors.html


http://my28chev.blogspot.com.au/2013/10/steam.html


Steam


Trucks and Tractors