The purpose of this Blog

This blog is to detail my 50 years (1973 - 2023) with a 1928 Chevrolet tourer, affectionately called "The Red Chev".

The acquisition, restoration, improvements and my experiences over the years are covered in as much detail as I can remember.

Some of the later postings include car club outings and other vintage car items that I hope will be of interest to people.

If you have the time, scroll back to where it all began in 1973 and follow the journey so far.

Thanks for dropping by.

Regards Ray Dean


See my new section "The Red Chev - Repairs, Improvements, Maintenance and Technical Details" located on the left hand side of the screen.


Pages

Tuesday, March 24, 2015

The 1929 Chevrolet Tourer of Terry Petridis

The 1929 Red Chev Tourer of Terry & Josie Petridis is one of the best presented vintage Chevs I have seen in a long while. The restoration done by the previous owner was to a very high standard.


If we travel back to last year, I am sure Terry would agree that the most important day for his 29 Chev so far was being the bridal car for his daughter's wedding

The Red Chev proudly joined in the event as the transport for the bridesmaids to the church.


The very proud father of the bride and his beautiful daughter


Sunday, March 22, 2015

Ouch!!


Terry Petridis 29 Chev sedan & Matilda the 28 Chev Tourer. (Working Bee)

Beautiful day to venture over to Terry's place to knock off a couple of jobs before they got worse and caused a real problem.

The first was his immaculate 29 sedan.


This needed a washer on each axle at the hub just to tighten things up a bit. Terry picked this up as the 29 hubcaps, yes that's hub caps on a vintage Chev, were a bit loose, and had it not have been picked up would have chewed up his axle key ways. Simple fix.

The next patient was Matilda the 28 Chev Tourer.


This old girl needed some work on the wooden spoke wheels.

The front driver's side just required drilling, and glueing in timber dowels to expand the spoke where it passes through the fellow.

The driver's rear was a bit more involved, as the spokes themselves were in pretty good condition, but the hub was loose, allowing the spokes to move around, creating a noise in the short term, and if left untreated, would have caused some drama down the track.

The brake drum was removed, the area of the spokes that contacts the hubs and brake drums was sanded and treated with Chair -Loc to expand and fill the grain.

Shim material was wrapped around the hub to ensure a tight fit, the hub re-fitted, and left to soak in some chair loc while the pit crew ventured out for supplies and brunch.

After about four hours both wheels were drilled, re-dowelled, glued and were as tight as a drum, making a metallic ringing sound when tapped with a hammer.

The re-dowelling process was identical to what I did on the Red Chev in 2010 and Chris's 1926 Chev in 2014. Pleased to say both cars are still going very well, wheel wise. Some library pictures below from the Red Chev wheel restoration.


A few pictures taken by Terry of the driver's rear being assembled.


Spring washers were fitted to replace loctite that a previous owner / mechanic had used on the hub bolts and nuts. They were never going to come loose, but not as effective as spring washers.


The passenger side wheels still need to be looked at at some later stage, but suspect if anything will just need either a bolt re-tighten or at most drilling, dowelling and glueing.

Always good to catch up with Terry and Josie.


Sunday, March 15, 2015

Stan the 1925 Chevy goes to a wedding

Patrick has sent me some great photos of his pride and joy Stan the 1925 Chevy, looking very smart.


Monday, March 9, 2015

Kev's Chev - Another 1928 Aussie Chev being restored - Update 9th March 2015

To see the earlier postings of this ongoing restoration, click on the link

http://my28chev.blogspot.com.au/2015/01/kevs-chev-another-aussie-28-tourer_50.html

The latest update as at 9th March 2015 is posted below

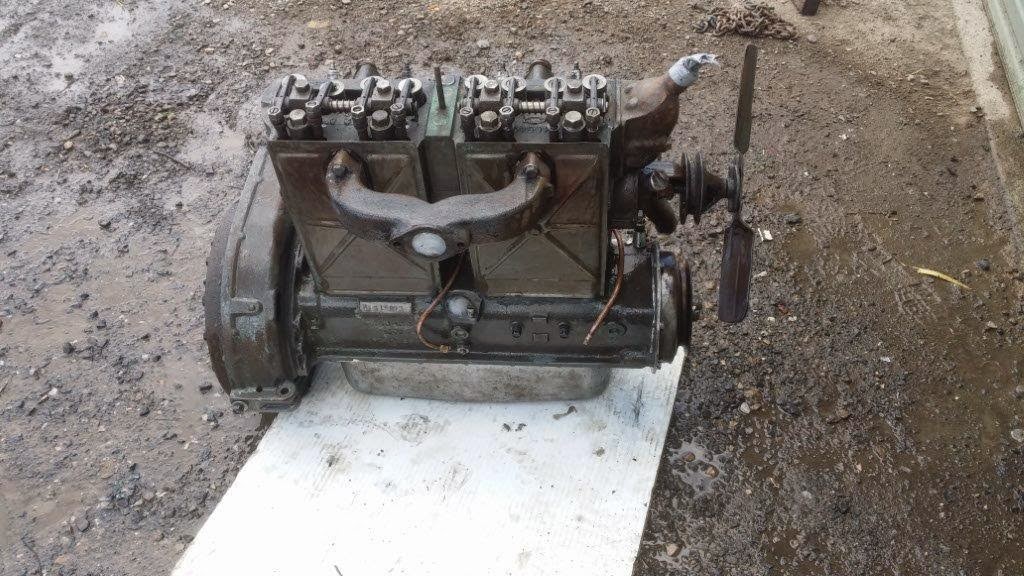
Engine was cleaned and the old paint stripped off


Gearbox pre stripping


Cluster gears and bottom shafts in very good condition


Gear selector repaired and top tower pins replaced


New fully sealed front and rear bearings fitted and bronze bushing between input and output shaft


All back together ready to paint


After removing head have decided to have block bored out to 30 thou oversize and fit new pistons and rings


Head is good with new valves fitted


Original pistons. Bearings and lifters are serviceable and will be reused


My home made spray booth ready for work with the stripped chassis prior to sending away for sandblasting


The old paint looked ok  but peeled off 


Sandblasted and ready for painting


The painting process has began.


Next was the Gearbox


And at last the chassis, which came up very nice indeed.


Now let the assembly of this Chevy begin...............