
Monday, December 15, 2014
A Rusty Chevrolet Berra-Swe
Another great version of Rusty Chevrolet, made by Bertil Jenson, who used a few pictures from my blog, along with a few of his own. Great video Bertil.
Sunday, December 7, 2014
Saturday, December 6, 2014
Battery Clamp Makover
Having recently given the cabling a makeover and converting to marine terminals, there was just one job remaining that again I had put off for many years, being the double battery clamp.
This was the custom double battery set up I did back in the 80's
These was ok except I could never get to the middle battery plug to check the water level as the clamps went right across the middle of the battery.

So while the floor was out recently to upgrade the cabling, I fabricated a new clamp from 25 x 12 mm aluminum angle. A few pop rivets, a coat of black paint to blend it in, and bob's your uncle.

Very happy with the finished result

This was the custom double battery set up I did back in the 80's
These was ok except I could never get to the middle battery plug to check the water level as the clamps went right across the middle of the battery.
So while the floor was out recently to upgrade the cabling, I fabricated a new clamp from 25 x 12 mm aluminum angle. A few pop rivets, a coat of black paint to blend it in, and bob's your uncle.
Very happy with the finished result
28 Tourer Wreck, very restorable
Found this on Facebook
"I believe it's a 1928 from all the research I've done. Pulled it out of a barn where it had been sitting for who knows how long. No engine or transmission, but the bell housing with clutch pedal is there. Have bumpers, grille/radiator, hood, dash, 2 windshield frames, and the headlights with mount bracket. I also have the frame for the canvas top. Car rolls and steers and the tires hold air. There is no title nor can I find a VIN tag. Make me a REASONABLE offer. Drop me an email with questions or if interested"


"I believe it's a 1928 from all the research I've done. Pulled it out of a barn where it had been sitting for who knows how long. No engine or transmission, but the bell housing with clutch pedal is there. Have bumpers, grille/radiator, hood, dash, 2 windshield frames, and the headlights with mount bracket. I also have the frame for the canvas top. Car rolls and steers and the tires hold air. There is no title nor can I find a VIN tag. Make me a REASONABLE offer. Drop me an email with questions or if interested"
Thursday, December 4, 2014


Wednesday, December 3, 2014
Monday, December 1, 2014
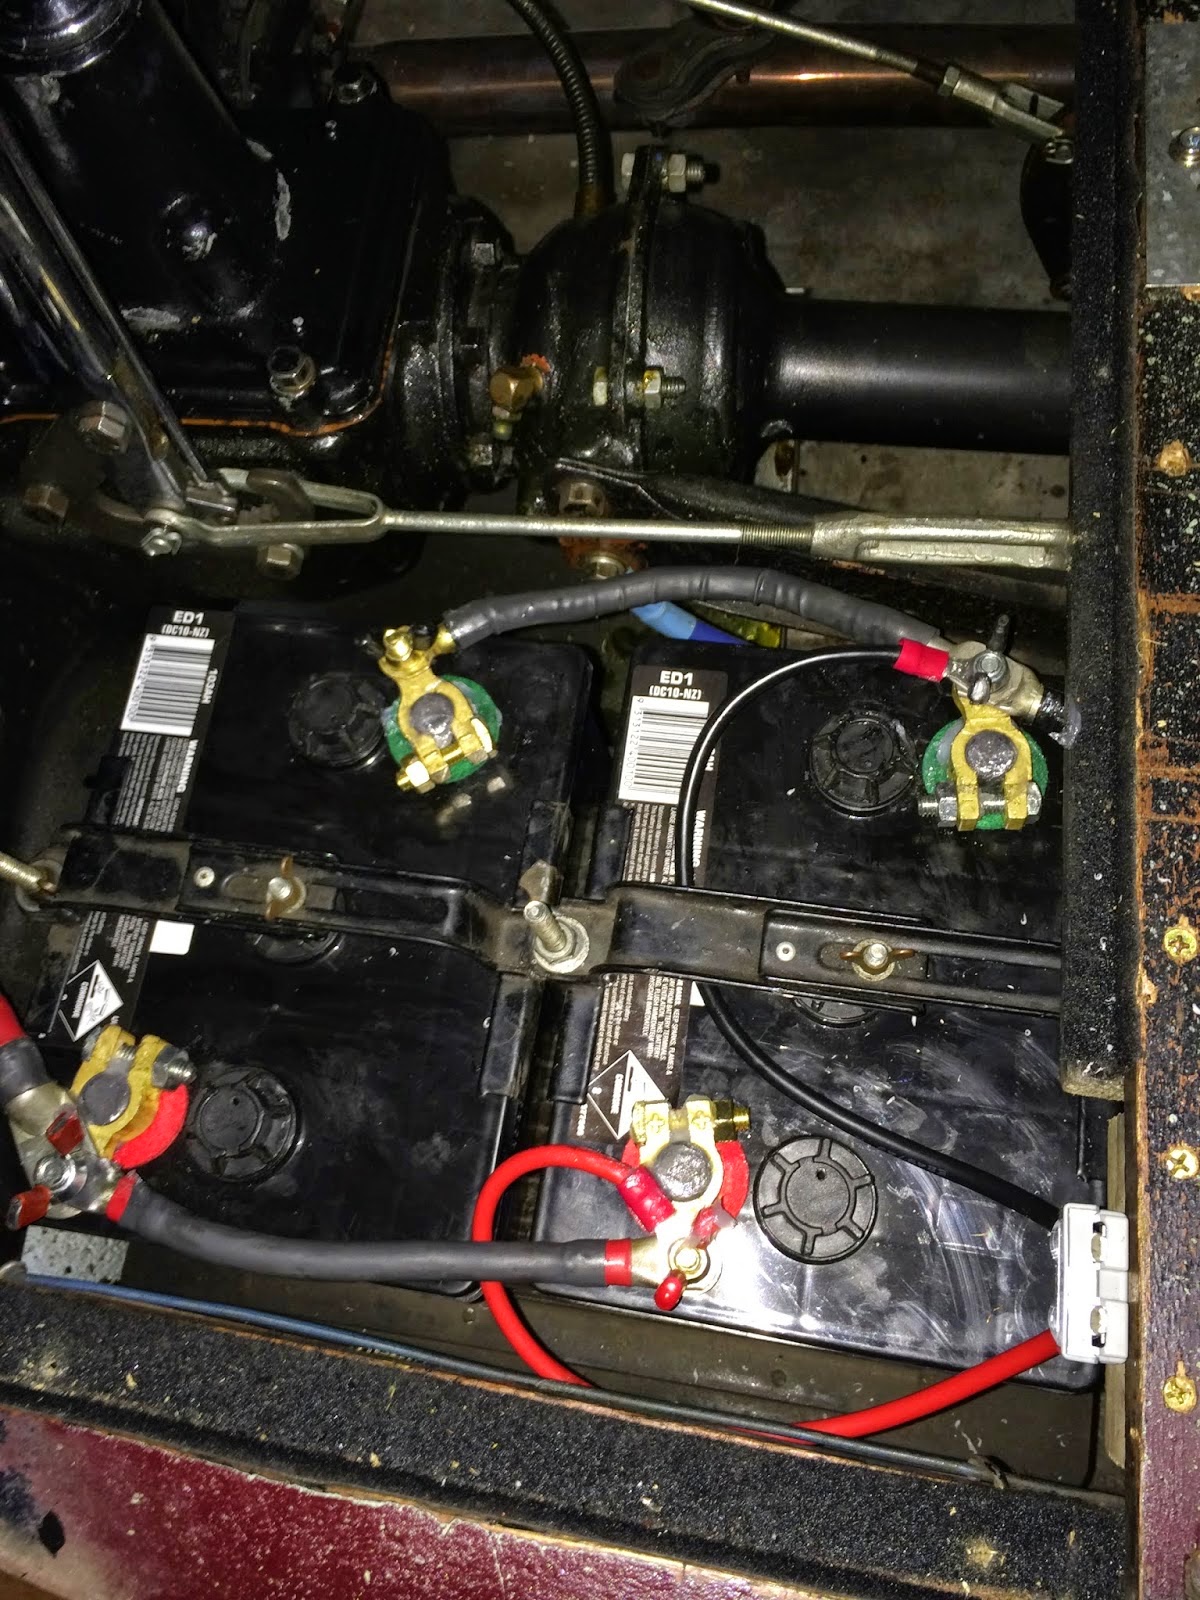
Battery Cable Make Over
For over 25 years I have run a dual 6 volt battery set up. As handy as it has been over this time the cabling has never been to my satisfaction, with piggy back connections and filler plugs hard to get at to check water levels.
Spurred on by the specials in a local auto store catalogue, I purchased some bits and pieces and tidied up the battery cables and connectors.
Gone are the traditional terminals, replaced by marine style terminals with wing nuts. All cables were fitted with lugs, soldered, not crimped.
I also put in a heavier cable on the flush mounted battery charging plug.
With a bit of heat shrink tube here and there, the dual battery tray looks a lot neater, and more importantly individual cables can be removed without killing the whole set up.
During the process I must have improved at least one connection, as the engine now cranks over slightly faster.
Who knows, one day I might even make a custom battery clamp that clears the center battery plugs.
On the other hand , you cant rush these things................................................
The end result
Subscribe to:
Comments (Atom)