The purpose of this Blog

This blog is to detail my 50 years (1973 - 2023) with a 1928 Chevrolet tourer, affectionately called "The Red Chev".

The acquisition, restoration, improvements and my experiences over the years are covered in as much detail as I can remember.

Some of the later postings include car club outings and other vintage car items that I hope will be of interest to people.

If you have the time, scroll back to where it all began in 1973 and follow the journey so far.

Thanks for dropping by.

Regards Ray Dean


See my new section "The Red Chev - Repairs, Improvements, Maintenance and Technical Details" located on the left hand side of the screen.


Pages

Monday, November 30, 2015

Day 72 - 28 Chev Ute Restoration (30th November 2015)

Only an hour or so today in the garage, but I think the work I did in that short time is one of the reasons I play around with old Chevs.

I love the process of taking a crappy, rusty, greasy part and turning it into something ready to be put back into use again.

In this case it was the rear axle retaining plates, so small, but a very enjoyable task.


Sunday, November 29, 2015

Day 71 - 28 Chev Ute Restoration (29th November 2015)

That's 2 days work that I am happy to have behind me.

The weekend started with a good friend and neighbor, Noel, doing some excellent welding in a few places on the axle housing


After a bit of grinding here and there, the axle spring saddles were prepared, then all the internal areas were painted to avoid any rust problems.


Saddle contact areas were then fully greased and the saddles fitted.


A gasket was made and the torque tube and diff were joined


The next few days will see, the diff cover, axle shafts and brake backing plates fitted. The complete assembly will then be painted and fitted to the chassis.

Getting There, at Last!!

Wednesday, November 25, 2015

Day 70 - 28 Chev Ute Restoration (25th November 2015)

Today was all about cleaning up the differential housing.

Removing 87 years of rust on the outside, grease, oil and "muck" on the inside.

After several work overs with a powered wire brush inside and out, a couple of high pressure cleans, a liberal spray of WD40, finished with a flush out with petrol, the end result was very pleasing.


Happiness is a diff housing clean as a whistle

Saturday, November 21, 2015

Something different - Working on a 1927 Chev

Combined a couple of things today, the first was grabbing a few parts for the Ute restoration from storage, and catching up with Grant Fowler www.montythe1928chevrolet.blogspot.com.au and a mate of his Mick Tutty from Bairnsdale

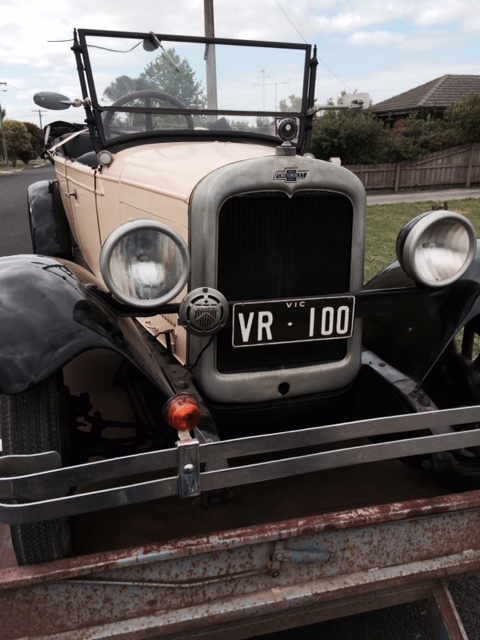
Mick brought down to Grant's his fathers 1927 Chevy on a trailer for a working bee to see if we could get it running.

Below, Mick's 27 on the right, and good old Monty on the left


The 27 had not been running well for a few years so we checked the basics first

1. Compression - All cylinders were around the 55psi mark and ok.

2. Plugs, the existing were worn and carboned up. These were replaced with a set of  Autolite 3077's. set at 30 thou.

3. Tappet clearance was checked, all were ok.

4. The points were way out of range and were reset at 25 thou.

5. Timing - This was the hardest part, as I have never worked on a 27 Distributor before
                                
                          
We had a couple of attempts at getting top dead center, loosening the distributor cam and resetting it at number one. No sign on the first attempt, then on the second it burst into life, running very smoothly.
                        
We soon had it driving around the block and back up on the trailer for Mick's 2 hour trip home.

Always a good feeling when an old banger comes off a trailer not running and drives back on the trailer under its own steam.

Have no doubt that with a few days here and there tiding up the 27, it will become a very reliable car.

Mick's 27 has 4 wheel brakes, which may have been retrofitted by a previous owner, or fitted by a Chev dealer to sell the car after 4 wheel brakes became standard in 1928.


Thursday, November 19, 2015

Day 69- 28 Chev Ute Restoration (19th November 2015)

Started working on the rear axle housing with the plan being to use a 29 housing as the original ute housing has some decent off road dents, which would have required an fair amount of impact to do, so I was not prepared to risk the axle housing being slightly bent.

Using a 29 housing just requires the brake backing plates being changed as they are different, to accommodate the two piece external brake band.

I picked up a 29 housing a while back, in very good condition, and now the strip and clean begins.


6 rivets on each backing plate need to be ground down then driven out with a pin punch.


This is new, never done it before, never too old to learn.


Like a few Chev Rear axle housings I have seen, the saddle location fitting works itself  a bit lose and starts leaking oil. The problem is easily fixed with a complete weld around the fitting and a bit of peening of the rivet head.


This is the 4th time, including Monty the 28 Chev, that I have removed the rear axle inner seals, and by far was the easiest, thanks to a home made slide hammer that Grant Fowler's late father, Wayne Fowler made many years ago, and no doubt served him well.

It is now an official Chev restoration tool.

Wish I had one during the original 1973 restoration and the 2007 restoration for my daughters wedding.

Thanks Grant, and your Dad also.

See the full story of Monty the 1928 Chev at http://montythe1928chevrolet.blogspot.com.au/

Wednesday, November 18, 2015

Day 68- 28 Chev Ute Restoration (18th November 2015)

After a struggle over the last few days, pleased to say the tailshaft and diff are now locked into the torque tube as a complete unit.

Diffs are one of the jobs I am not fond of as they are so time consuming.

This proved to be no different, backlash has to be spot on as does the position of the pinion.

Eventually, after stripping out the tailshaft for the 6th time, I got the contact area on the crown wheel within limits, then set the backlash, again within limits.

How good I have set up the diff will reveal itself  during the first few 100 k's.

It will either purr (as much as a Chev 4 diff can that is) or howl its head off.


Saturday, November 14, 2015

Day 67 - 28 Chev Ute Restoration (14th November 2015)

Very happy with the progress made today.

New bearings were pressed onto the tailshaft, pinion and then the whole setup was fitted and locked with a split pin


Next task was cleaning out the old congealed grease and muck from inside the torque tube. This is where an extension for the rotary wire brush and an extension for the extension comes in handy


The diff adjustment threads were cleaned as was the gasket face.


A liberal spraying with degreaser followed by a high pressure wash left the inside of the torque tube as clean as a whistle


Friday, November 13, 2015

Day 66 - 28 Chev Ute Restoration (13th November 2015)

Sometimes a lot of work can go into something with not a lot to show for it, but very important all the same.

Stripping, cleaning and reassembling the differential carrier is one of them.

Over the last few nights I measured, checked and selected the best internals of 4 diffs. Side gears were ok, but replaced the spider gears and shafts with ones with less wear.


All parts were wire brushed, soaked in petrol for 24 hours to dislodge any stubborn grease and grim, pressure washed, then the whole process repeated.


 The carrier was reassembled, shims were fitted behind the side gears to reduce slop, 20 thou on the crown wheel side, 10 thou on the other side.

New bearings were fitted and the diff was put into the cupboard for a few days till the torque tube and tailshaft are ready.


Tomorrow we tackle the tailshaft, torque tube housing and pinion.

Monday, November 9, 2015

Day 65 - 28 Chev Ute Restoration (9th November 2015)

Today was about sorting out a good tailshaft, crown wheel and pinion.

The original ute crown wheel has been replaced at some stage, and with new carrier bearings will be very serviceable.


For the 3rd time in my 43 years working on 1928 Chevs, I will try my luck at using a mixed crown wheel and pinion, as the ute pinion has a chipped tooth.

As a 20 year old I was told by several old timers, that using a mixed crown wheel and pinion will either lap in, but most probably not, and will get progressively worse, turning into a howl.

I am prepared to try it again as I got away with it in 73 and 97 on the Red Chev, and if not I have a couple of new sets that can be put in.


I swapped a 29 tailshaft for this 28 with Steve from Bittern, which is in very good condition.

The pinion taper is ok as is the key way, sharp edges with no spreading.


The uni joint spline is very good with only the slightest hint of wear.


The tailshaft bush surface is very good, and with a new Billy Possum Tailshaft bush left over from the Red Chev 2007 restoration, all is well here also.


I am a big fan of Billy Possum, their parts are first class, and I have never had any dramas


The next few days should see the diff, torque tube housing and tail shaft become a combined unit.